
Understanding the Problem of Indoor Flies
Keeping food preparation areas clean and hygienic is a priority in every home and commercial kitchen. One of the biggest challenges that compromise both cleanliness and food safety is the presence of houseflies. These insects not only create annoyance but also carry harmful bacteria and germs that can contaminate food surfaces. Unlike outdoor areas where flies are expected, indoor food preparation zones demand strict control. For this reason, many people turn to safe, chemical-free solutions like a fly trap indoor setup. This article provides a detailed, comprehensive guide to creating your own traps, understanding why they work, and how to keep your food prep spaces safe and comfortable without harmful insecticides.
While conventional sprays and toxic baits might be effective, they endanger people, pets, and food. A much healthier path is to build a non-toxic system that captures flies naturally. With a few tools, ingredients, and practical know-how, anyone can construct an efficient fly trap indoor option that works around the kitchen clock. Let’s explore how.
Why Choose a DIY Fly Trap for Indoor Use
Flies land on garbage, decaying food, and even animal waste before buzzing into the kitchen. This makes them perfect carriers of harmful bacteria such as E. coli or Salmonella. Choosing a fly trap indoor alternative helps you reduce these risks without relying on potentially dangerous chemicals. Below are some core reasons why homemade, chemical-free traps are essential:
- Health protection: Chemical sprays often settle on kitchen counters, dishes, and utensils. DIY traps avoid this hazard.
- Food safety: Fresh produce, breads, and meats can easily attract flies. Prevention keeps food surfaces pure.
- Eco-friendly: Homemade traps use recyclable materials such as jars, bottles, and paper.
- Budget-friendly: Most trap designs rely on common kitchen ingredients—no need to spend extra money on commercial solutions.
When you weigh these benefits, it becomes clear that chemical-free approaches give both peace of mind and effective protection. Parents, pet owners, and restaurant staff all benefit equally when they reduce insecticides indoors.
Essential Materials and Tools for Your Indoor Fly Trap
Before diving into construction methods, gather the core items. Building a fly trap indoor project does not require professional tools—just simple household supplies. The most commonly used materials include:
Common Supplies
- Plastic bottles or glass jars
- Scissors or utility knife
- Tape or glue
- Paper for funnels or cones
- String or rubber bands
Attractants for Flies
Homemade traps rely on bait to lure flies. Some of the safest, most effective attractants include:
- Sugar water
- Overripe fruit or fruit peels
- Apple cider vinegar
- Simple syrup mixed with yeast
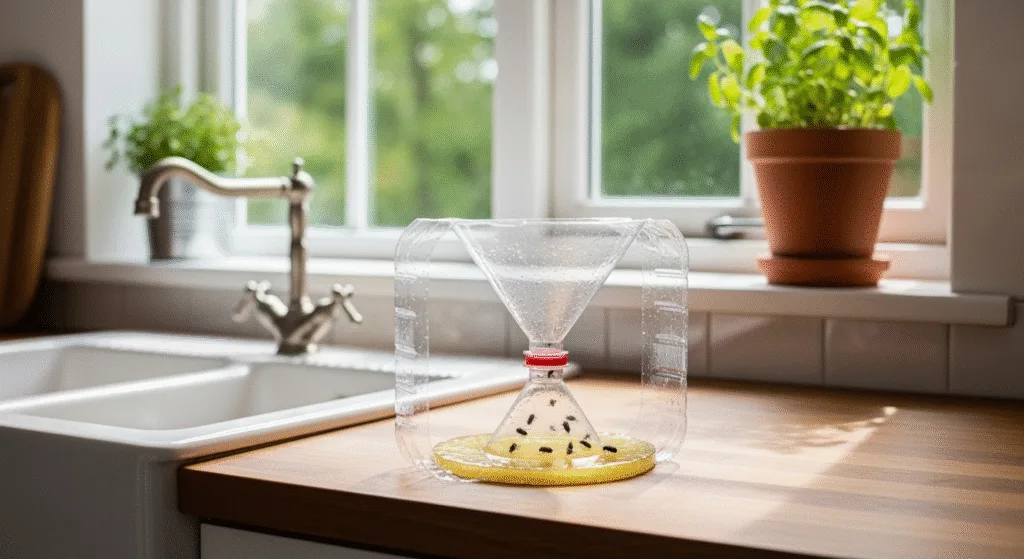
Diagram of a Simple Bottle Trap
Consider a clear plastic bottle cut in two pieces: the bottom holds the bait, while the inverted top acts as a funnel that guides flies down but rarely lets them escape. This design works well in kitchens because it holds liquid attractant neatly and limits open mess.
Step-by-Step Guide: How to Build an Indoor Fly Trap
Now that you have the tools, follow this hands-on process to make a reliable fly trap indoor for your food prep spaces.
1. Prepare Your Container
Take a clean, empty plastic soda bottle and cut it about one-third from the top. Set the narrower, top section aside. Remove any labels so you can monitor results later.
2. Mix the Bait
Pour half a cup of apple cider vinegar and one tablespoon of sugar into the bottom. You can also add a drop of dish soap to break surface tension, causing flies to sink once they land.
3. Create the Funnel
Invert the cut-off top into the bottle’s base, forming a funnel. Flies detect the smell, crawl downwards, and become trapped inside.
4. Secure and Place
Seal with tape if needed, then place your trap in a corner of the prep room—ideally near fruit baskets, trash bins, or drains. Keep it away from direct contact with food, but within the range where flies usually travel.
5. Maintain and Refresh
Every few days, dispose of trapped flies and replace the bait mixture. A clean, refreshed trap remains attractive and sanitary.
Placement Strategies for Maximum Effectiveness
Even the most well-built trap becomes ineffective if placed poorly. Since flies naturally gather near scents, lights, or warm zones, consider these placement ideas for your fly trap indoor system:
- Near waste bins: Place traps close to garbage or compost containers, which are often prime breeding sites.
- Close to fruits: Traps discourage flies from swarming around fruit baskets.
- Close to windows: Flies usually enter through windows or doorways. A trap stationed nearby reduces entry points.
- Out of traffic zones: Keep traps slightly hidden or tucked into corners to prevent knocks or spills.
By placing traps strategically, you reduce fly population and keep distractions away from busy cooking areas.
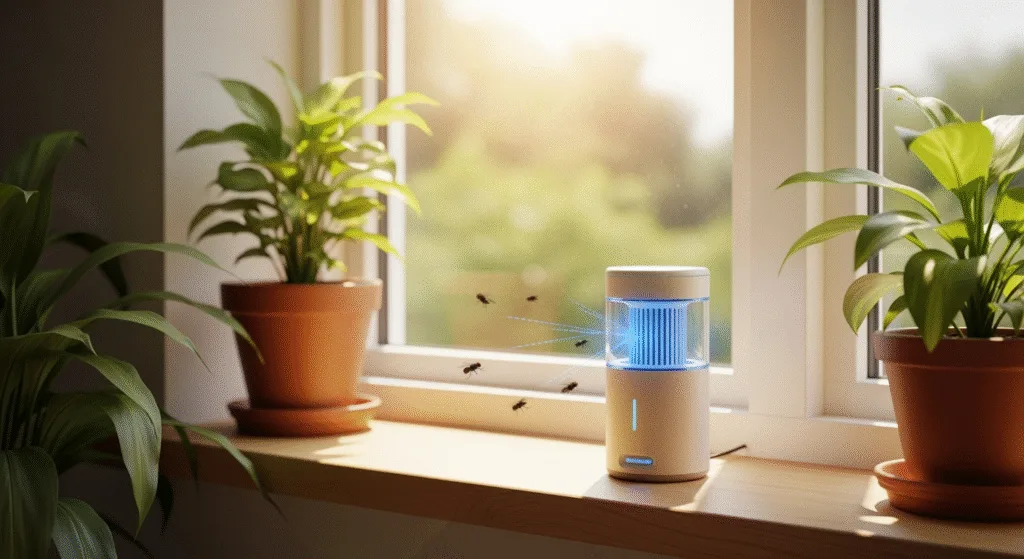
Safe Alternatives and Enhancements
While basic DIY traps serve well, you may want to explore additional methods that complement your core fly trap indoor strategy. Consider the following:
Natural Repellents
Certain herbs and essential oils repel flies, such as basil, lavender, peppermint, and eucalyptus. Planting these herbs in indoor pots or keeping oil diffusers nearby discourages incoming insects.
Screening and Barriers
Prevention always works better than control. Ensure that windows, vents, and doors are properly screened. This simple measure reduces fly entry in the first place.
Sticky Ribbons and Paper
Sticky fly ribbons, though not always aesthetically pleasing, provide passive defense. They catch flies that escape the primary trap.
DIY Variations
Experiment by altering bait ingredients. Yeast and sugar water create natural carbon dioxide, a strong attractant. Overripe bananas or mango peels also lure flies effectively.
Cleaning, Maintenance, and Food Safety Tips
Hygiene matters. Even the most efficient traps fail when the surrounding kitchen lacks sanitation. To maximize your fly trap indoor results, incorporate the following habits:
- Regular cleaning: Wipe down counters, cutting boards, and prep areas immediately after cooking.
- Proper waste disposal: Empty trash bins frequently. Keep lids tightly sealed.
- Drain maintenance: Flies often breed in damp drains. Use a hot water flush daily and consider natural cleaners.
- Trap refresh: Replace vinegar, syrup, or fruit bait every few days to avoid foul odor build-up.
Maintaining a proactive cleaning schedule ensures overall success. Within weeks, fly numbers decrease significantly, creating a safer cooking environment for both family and guests.
Comparisons: DIY vs. Commercial Traps
Many kitchen owners debate whether to build a homemade fly trap indoor option or simply buy a commercial product. Here is a table summarizing the differences:
| Aspect | DIY Fly Trap | Commercial Trap |
|---|---|---|
| Cost | Minimal, often free using recycled materials | Ranges from moderate to expensive |
| Safety | Non-toxic, eco-friendly | Many contain chemicals |
| Effectiveness | High when refreshed often | High, but depends on brand & ingredients |
| Convenience | Requires occasional assembly & cleaning | Ready to use, less maintenance |
Ultimately, both approaches can work. However, if you prioritize budget and safety in food prep areas, DIY traps take the lead.
Troubleshooting Common Issues
Sometimes homemade traps may not catch as many flies as expected. Here’s how to improve results:
- Problem: Few or no flies enter the trap.
Solution: Use more fragrant bait—apple cider vinegar or overripe fruit usually boosts attraction. - Problem: Flies escape after entering.
Solution: Narrow the funnel opening or add a slippery coating inside the funnel. - Problem: Odors become unpleasant for household members.
Solution: Replace bait more often and clean containers thoroughly.
Adjustments guarantee better function and keep your fly trap indoor program consistent.
Long-Term Prevention Strategies
Beyond traps, long-term efforts preserve cleanliness. Consistency makes the greatest difference. Here are a few habits that support lasting success:
- Store food properly: Use sealed containers whenever possible.
- Refrigerate perishables: Even fruits last longer in cooler environments and attract fewer flies.
- Time your cleaning: Daily sweeping, wiping, and dishwashing reduces fly attraction.
- Dry and ventilate: Moist surfaces invite insects. Maintain airflow in the kitchen.
By combining traps with preventive measures, you secure lasting relief from fly invasions.
Conclusion: A Safer Way to Guard Food Prep Areas
Indoor flies compromise both comfort and health. Fortunately, DIY, chemical-free solutions address this issue effectively. A well-built fly trap indoor setup creates a safer space free of harmful pesticides while reducing insect presence in your cooking zones. By applying natural attractants, smart placement, consistent maintenance, and long-term hygiene, you can transform your kitchen into a fly-free zone. This balance of safety, effectiveness, and affordability makes chemical-free traps the best option for any household or restaurant. The key is commitment—once you develop a routine, results speak for themselves. Protect your loved ones, boost your home hygiene, and breathe easy knowing that your cooking environment is healthier and cleaner without toxic sprays or exposure.